Pre-Flight Check
- These instructions are intended specifically for checking your version of cPanel or WHM via the command line or the WHM dashboard.
- I’ll be working from a Liquid Web Managed CentOS 7 server, and I’ll be logged in as root.
Step #1: Log In to WHM
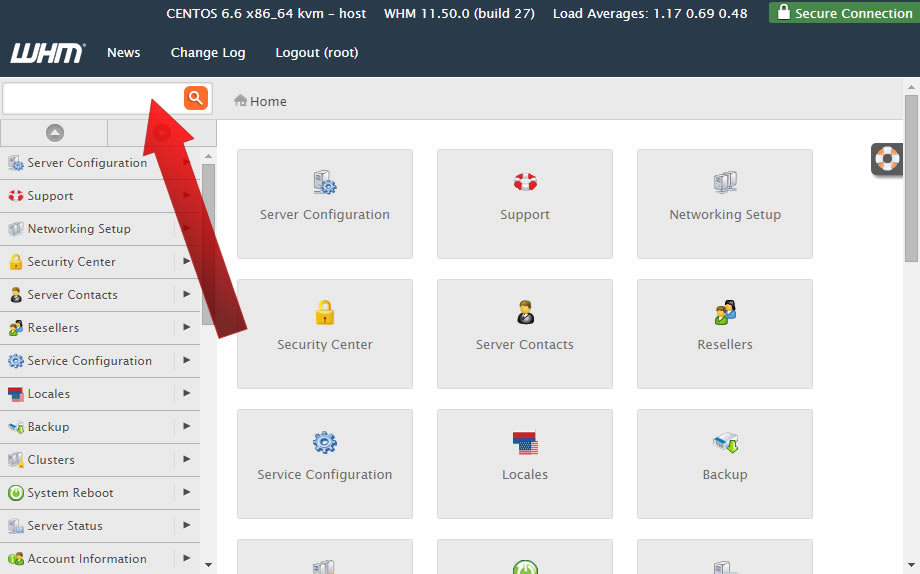
First, log in to WHM. You’ll arrive at your WHM dashboard:
Step #2: Navigate to Upgrade
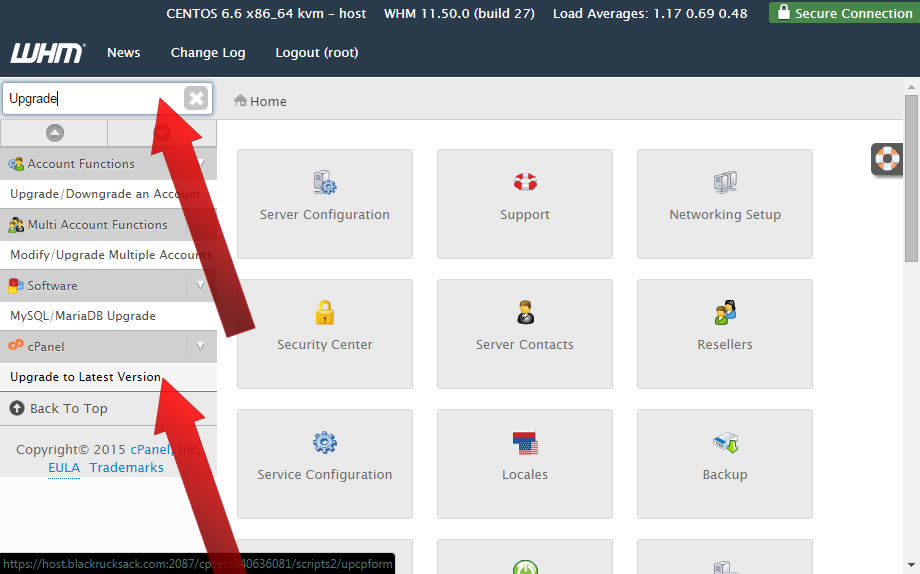
In the top left corner search for Upgrade, then click on Upgrade to The Latest Version:
Step #3: Begin the Upgrade
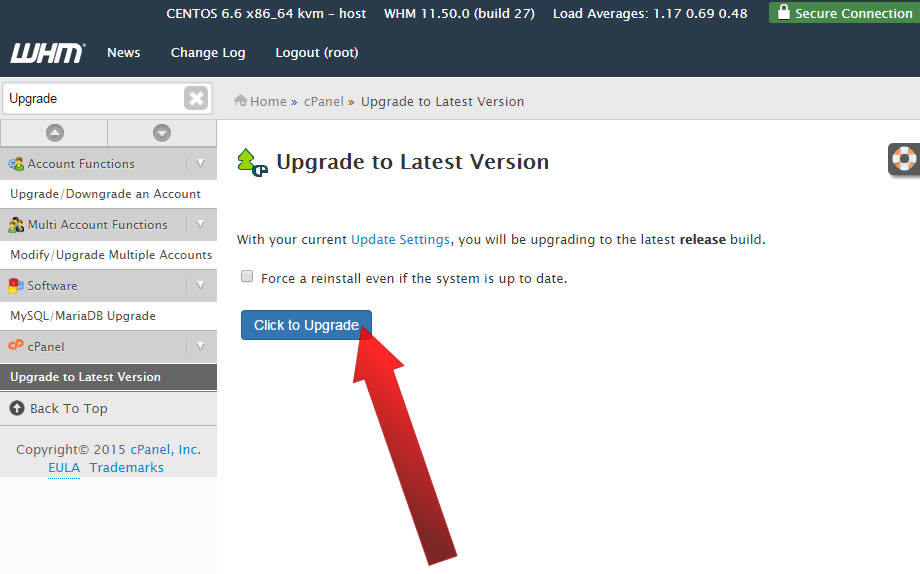
To begin the upgrade, click the button that says Click to Upgrade:
Step #4: Upgrade Status and Completion
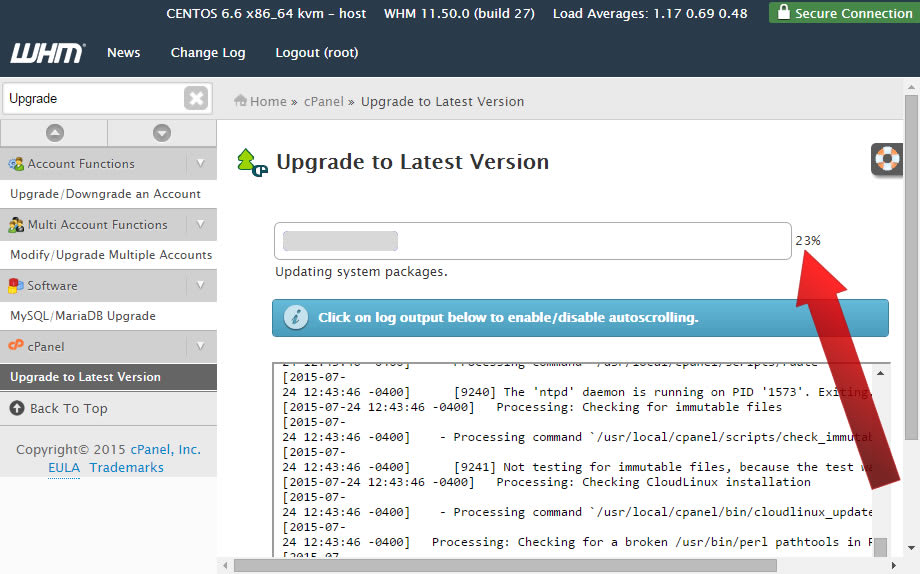
As the upgrade progresses the status message will say Updating system packages, and you’ll see the percentage complete as displayed below:
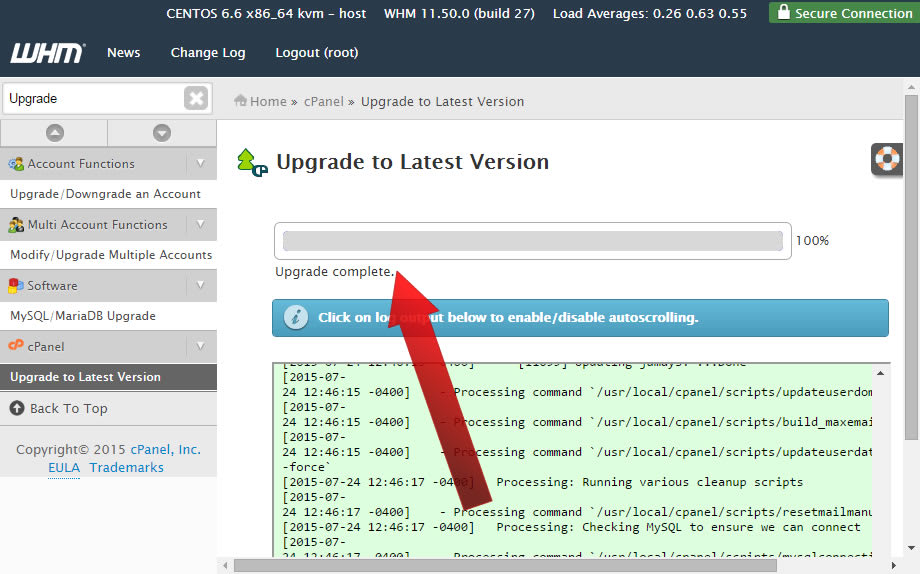
When the upgrade completes you’ll see a message that says Upgrade Complete:
Upgrade Blockers
Occasionally, issues arrive with the upgrade due to what are called ‘blockers’. You can see a list of upgrade blockers here at cPanel.
If you have any additional issue, please contact Liquid Web’s Heroic Support Team!
Related Articles:

About the Author: J. Mays
As a previous contributor, JMays shares his insight with our Knowledge Base center. In our Knowledge Base, you'll be able to find how-to articles on Ubuntu, CentOS, Fedora and much more!
Our Sales and Support teams are available 24 hours by phone or e-mail to assist.
Latest Articles
How to Use React Spring
Read ArticleAccessing Man Pages on Ubuntu 16.04 LTS
Read ArticleTLS vs SSL: A Comparison
Read ArticlePremium Business Email Pricing FAQ
Read ArticleMicrosoft Exchange Server Security Update
Read Article


